Introduction to R

Before I learn a new software or new skills, I often like to do some homework and ask the silly questions like:  what, when, why, and how, to give me a base understanding of the software.  So, let’s work through these questions for R.

What is R?

R is a system that is used for statistical computation and graphics.  It has a number of aspects to is that include a programming language, graphics, interfaces or connection opportunities with other languages, and debugging capabilities.  I have found that many do not refer to R as a statistical software package, because it can do so much more.

What does this all mean?  It means that R is a very robust program that folks use for a variety of reasons, it’s not just for statistical analysis!

Where did R come from?

The history of software packages can be quite interesting to learn about.  For instance R has been defined as a “dialect” of S.  Some of you may remember the statistical software called S-Plus?  Well, that’s where R comes from.  It was developed in the 1980s and has been one of the fastest growing open-source software packages since.

What does “open-source” mean?

I’m sure you’ve heard of this term in the past or in different contexts.  One thing that you will hear when people talk about R, is that it is free or that is is open-source.  Keep in mind that open-source means that it is freely available for people to use, modify, and redistribute.  Which usually translates to: there is no cost to acquire and use the R software!  Another aspect of open-source is that it is or rather can be community-driven.  So, any and all modifications to the software and subsequent documentation (if it exists) is driven by the community.

Please note, that R has matured over the years, and today’s R community is extremely strong, and encouraging documentation for anything that is released, making it a very desirable product.  This may not always be the case with open-source software.

Who uses R?

Business, academia, statisticians, data miners, students, and the list goes on.  Maybe we should ask the question, who is NOT using R, and then ask the question Why?

There are so many different statistical software options today and which one you choose to use will depend on several different factors:

  • What does your field of study use?
  • If you are a graduate student, what does your supervisor suggest and use?
  • What type of analyses are you looking to perform and does your program of choice offer those analyses?
  • What types of support do you have access to?

How does R work?

If you’re looking for a statistical package that is point and click, R is not for you!  R is driven by coding.  YES!  you will have to learn how to write syntax in R.  You can use R interactively by using R-Studio, and you may never reach a point in your studies or your research where you will move away from the interactive capabilities of R – so no big worries!  Besides, today there are a lot of resources available to help you learn how to use R.  So don’t let that stop you!

Base R and Packages

When you download and install R, the Base R program is installed.  To run many of the analyses you may be required to install a package.  What is a package?  It is a collection of functions, data, and documentation that extend the current capabilities of the Base R program.  These are what makes R so versatile!  As we work through our workshops and associated code, I will provide you with the name of the Package.  There are a number of ways to acquire and install packages, we will review these as we work through them.  Please note that there may be several packages that perform a similar analysis, please read all the documentation before selecting a package to use.

How do I acquire R? Where can I download it?

Visit the Comprehensive R Archive Network (CRAN) website to download the R software.  https://cran.r-project.org/   Please note that this will also be the website used to download future packages used in analyses as well.

The website has comprehensive instructions to assist you with the installation on your own computers.

Available interfaces for using R

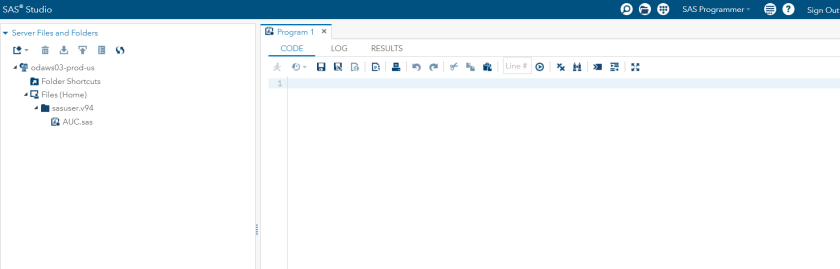
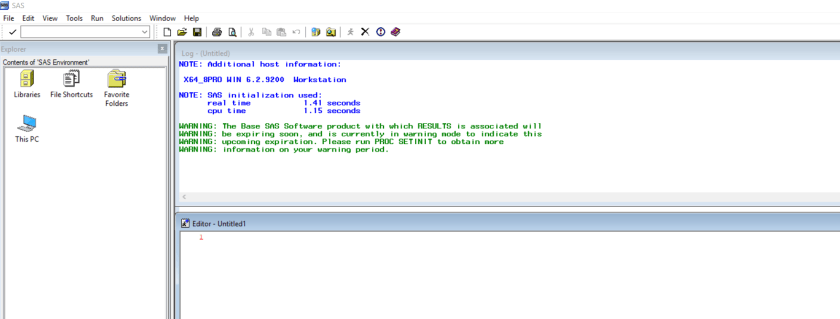
There are essentially two ways to use or interact with R:  RStudio or by using the R Console.  The code or syntax you will write or use will be the same for either interface, however RStudio provides you with a more interactive experience.  This is the interface that I will use for these workshops.  I will demonstrate the R Console to show you the basic differences.

In order to use RStudio, you will need to download and install it once you have R on your computer.  To download R-Studio, visit The RStudio website at https://www.rstudio.com/

Let’s take a tour and become familiar with the windows in RStudio

When you first open RStudio you’ll see 4 windows or 4 sections on your screen:  editor, console, history, and environments with tabs.  Let’s start with the environments window – you should see 6 tabs:  Environment, Files, Plots, Packages, Help, and Viewer.   The Environment tab lists the files/datasets that are being used during the current project.  The Files tab allows you to view all the files that are available in your working directory.  The Plots tab will show any plots that are created during your session.  The Packages tab will list all packages that you have loaded.  The Help tab is self-explanatory.  A quick sidenote, the Help window is great!  Please take advantage of it by using the search function in the Help tab.

The History window will list all the lines of code that you have run until you clear it out.  A great way to see what you have done – especially if you encounter troubles along the way.

That leaves the editor and the console.  The editor is where you open an R script file and the console is where you run your code as you type it in.  To run code that is in your editor – select the bits of code and hit Ctrl-Enter to run it.  In the console, you type the line, hit enter and it runs immediately.  I use these two windows in tandem.  To move between these two windows – Ctrl-2 moves you to the Console window and Ctrl-1 brings you back to the editor window.  Of course, a mouse works great too!

One more quick tip – the console window can fill up quite quickly and to me, can feel very cluttered.  Remember the History window will keep a history of your code, so it would be ok to clear out the console as you see fit.  In order to do this, use Ctrl-L to clear it out.

Working Directory

Sometimes having your program always refer to the same directory, when saving files or when opening files, can be very handy.  You’ll always know where your files are!  R makes it very easy to accomplish it.

First, let’s do it the long way.  To see what the current working directory of your RStudio is by typing in your editor window:

getwd()

To change the working directory for the current project you are working on type:

setwd (“C:/Users/edwardsm/Documents/Workshops/R”)

Of course, you’ll want to make this a directory on your computer 😉   But as you look at this – do you notice anything odd about this statement???  You’ll notice that the slashes / are the opposite direction than you normally see on a Windows machine.  Changing these manually can be a time consuming effort.  One way around this is to add an extra \ after everyone in your location.  See below:

setwd (“C:\\Users\\edwardsm\\Documents\\Workshops\\R”)

Always double-check your working directory by checking getwd() Are the results what you were expecting?  If not, try it again.

There are easier ways to accomplish this as well:

  • In RStudio, Session in the File Menu provides 3 options for setting your working directory:
    • To Source File location (the directory where you save your R script and program files).  If you try this when you first open RStudio you will get a message that says: “The currently active source file is not saved so doesn’t have a directory to change into.”  In other words you haven’t opened any files yet, so R has NO idea where it is working from.  This option works only after you have opened a file.
    • To Files Pane Location – in the Files Pane – navigate to the location you want to have as your Working Directory.  Once you have it selected in the Files Pane, then choose Session -> Set Working Directory -> Files Pane location.  You will see the new working directory appear in your console and it should match what you select in the Files Pane.
    • Choose Directory – will open a windows dialogue box where you navigate and select the directory of choice.  This option is probably the best option once you have opened RStudio and have not opened a file.
  • While you are in the Files Pane location – navigate to the directory that you would like to set as your working directory, then in the Files Pane – select More -> Set Working Directory.  This option is very similar to the Files Pane Location option under the Session menu of RStudio.

As a best practice, when you are working with R – set your working directory once you open the program.

R packages

As mentioned earlier, R is made up of a number of packages.  Remember that a package is a collection of functions, data, and documentation on a specific topic or analysis.  There are 2 types of packages:  standard packages – those that came with your Base R OR a package that you downloaded from CRAN or elsewhere.

To view a complete list of R packages available on CRAN, please visit https://cran.r-project.org/web/packages/available_packages_by_name.html

Once you download a package of interest, you need to install it and load it before the functions within are available to you in the R environment.

There are a couple of ways, that I am aware of – at the moment, of downloading and installing new packages:

  •  1.  From the RStudio file menu, select Tools, then select Install Package

Notice that the default is to search for the package on the CRAN website
If you are using this method – please ensure that the Install dependencies box is selected.

  •  2.  Typing  a command in the Editor window

install.package(“packagename”)

You will notice that with either method that use, in your RStudio Console – there will be a series of operations that occur during the installation.

Once you have the package installed, you will still need to load the package in order to let R know that you are ready to use the functions within the package.  Without loading the package,  R will not be aware of the package or of the functions you may be trying to use within a package.  To load a package please type:

library(packagename)

As we work through the workshop, I will try to have the packages we are using listed at the top of each R script we will be using.  I will ask you to install the package and then load it to make it available for your session.

Keyboard Shortcuts

For anyone who relies more on their keyboard than their mouse, here are a few keyboard shortcuts that may be helpful.

Keyboard Shortcut                                        Function

Ctrl-Enter                                                        Submit code
Ctrl-1                                                                Move to Source window
Ctrl-2                                                                Move to Console window
Ctrl-L                                                                Clear Console window
Alt –                                                                    <-

Let’s Get Started with Reading Data

Now that we have R and RStudio installed on our computers, and we have a little background and history about R, let’s get started by learning how to read data into the R program.

Notes to Read Data into R are available as a PDF document. Please download and save on your laptop.

The session was recorded – but we had a fire alarm and then the recording didn’t work for the last part of the workshop.  The links to the 2 recordings are here though.

Introduction to R – Reading data into R – September 17, 2019 (Part I – before the fire alarm)

Introduction to R – Reading data into R – September 17, 2019 (Part 2 – after the fire alarm – note that only part of the remaining workshop was recorded)


Name

ARCHIVE: F19 Workshops and Tutorials

Oh yes!  It is that time of year again 🙂  I have to admit that I love fall – my favourite season.  The time for so many new beginnings.  With this all in mind, the new schedule for F19 OACStats workshops is now open for registration at https://oacstats_workshops.youcanbook.me/.   Workshops will be approximately 3 hours long with breaks and hands-on exercises – so bring your laptops with the appropriate software installed.  Please note that the workshops are being held in Crop Science Building Rm 121B (room with NO computers) and will begin at 8:30am.

September 10: Introduction to SAS
September 17: Introduction to R
October 15: Getting comfortable with your data in SAS: Descriptive statistics and visualizing your data
October 29: Getting comfortable with your data in R: Descriptive statistics and visualizing your data
November 5: ANOVA in SAS
November 15: ANOVA in R

I am also trying something new this semester – to stay with the theme of new beginnings 🙂  Tutorials!  These will be held on Friday afternoons from 1:30-3:30 – sorry only time I could get a lab that worked with all the schedules.  They will be held in Crop Science Building Rm 121A (room with computers).  Topics will jump around a bit with time to review and work on Workshop materials.  To register for these please visit:  https://oacstatstutorials.youcanbook.me/

September 13: Saving your code and making your research REPRODUCIBLE
Cancelled:  September 20: Introduction to SPSS
September 27: Follow-up questions to Intro to SAS and Intro to R workshops
October 18: More DATA Step features in SAS
October 25: More on Tidy Data in R
November 1: Open Forum
November 15: Questions re: ANOVAs in SAS and R
November 29: Open Forum

I hope to see many of you this Fall!

One last new item – PODCASTS.  I’ll be trying to record the workshops and tutorials.  These will be posted on the new page and heading PODCASTS.  I will also link to them in each workshops post.

Welcome back and let’s continue to make Stats FUN

Name

R vs. SAS

A question that comes up more and more in my position.  Graduate students starting their academic career or experienced researchers looking to keep up with the “trends”.

There was a recent article published on the RBloggers website, that compared the top statistical packages:  R, Python (?), SAS, SPSS, and Stata.  If you are interested in reading the original article I’ve linked to it here.  I’d like to summarize and show a few examples as well.

What do they look like?

R Studio is one of the more common ways that folks are using R today.  It is a comfortable environment – a little bit of GUI that really doesn’t leave you hanging out in space – ok maybe a little – but you’re fine once you get comfortable with the coding.

RStudio

Yes!  you read that correctly – you need to write coding in R – very similar to needing to write code in SAS.  The code or syntax is different for the 2 programs – but you need to write some code in order to conduct any statistical analyses in either program.

SAS as you may be aware has a few different interfaces as well.  There is the SAS Studio – used with the Free University edition

SAS Studio

Licensed version of SAS:

SAS

Sample coding

As I noted earlier each program has their own language or syntax.  R is comprised of packages that may deal with a type of analysis.  Within a package there are several functions.  SAS we have PROCedures with options and lines of code that will run the analysis.  Very similar concepts.  Each program will have documentation.  Since R is open source and community driven, the detail of the documentation will depend on the creator of the package.  SAS documentation is extensive but very technical at times.

R coding

library(ggplot2)
ggplot(fruit, aes(x=Yield)) +
geom_histogram()

plot(Yield ~ Variety,
col = factor(Variety),
data=fruit)

legend(“topleft”,
legend = c(1, 2, 3, 4),
col = c(“black”, “red”, “green”, “blue”),
pch=1)

SAS coding

Proc sgplot data=out_asp2010_test;
scatter x=julian y=mms / group=entry yerrorlower= low4 yerrorupper = high4;
series x=julian y=mms / group=entry lineattrs=(pattern=solid);
xaxis label =”Julian Day”;
yaxis label = “Mms”;
title “Plot of Mms by Julian Day for 2010”;
Run;

Support

As noted above R is open source and community-driven.  Which also means that it is supported by the community.  Any questions, challenges you may encounter, you will use a variety of sources to find help:  the author of the package you are using, or a listserv.

SAS is a commercial product with professional support network to assist its users.  There are listservs of users as well.

Conclusion

As pointed out in the R Bloggers article, they both have their strengths and their weaknesses.  I’ll be honest I never through I’d see the day when banks and pharma started using R, but it’s here!  The small program that folks used because it was free and accessible, has now become a major contender in the statistical analysis world.

Which program you select to use, will depend on your background – what have you used in your undergrad or in your course – the level of support available to you on your campus, maybe what program your supervisor uses or recommends.  I used to recommend SAS if you were going to work in a workplace that needed standards, but after learning more about R and seeing its growth, I’m not sure that should be a reason to use SAS in academia anymore.

I, personally, believe, that we should be learning both programs – I know too much time to learn – but they both look awesome on a resume, and they both provide you with the opportunities to increase your skillset and talk stats to SAS and R users 😉

Name


Working with Binary and Multinomial Data in GLIMMIX

As we begin to appreciate the various types of data we collect during our research and understand that we should be acknowledging their diversity and taking advantage of this, we find ourselves working with binary and multinomial data quite often.  These types of data also lead us to working with Odds Ratios more than…  maybe we want to 🙂

I’ll be the first to admit that if there was a way to avoid them – I would – they can be a challenge to interpret and fun to play with – all at the same time!

So in an attempt to help interpret these OR (odds ratio) I’m going to lay out the steps you’ll need.  I’m also going to use the SAS output as a guide.  It really doesn’t matter what software you use to obtain your results (maybe I’ll play with R later this summer and add to this post), the steps will be the same.

So let’s start with some data – I’ve created a small Excel worksheet that contains 36 observations.  Each observation was assigned to 1 of 4 treatments and has a measure for a variable called Check (0 or 1) and a variable called Score (1, 2, 3, 4, 5).  Check is a binary variable whereas Score is a multinomial ordinal variable.

The goal of this analysis was to determine whether there was a treatment effect for both the Check and Score variables.  I will list the SAS code I used in each section.  But, to start let’s try this out:

Proc freq data=orplay;
    table trmt*check trmt*score;
    title “Frequencies of Check and Score for each Treatment Group”;
Run;

I like to use PROC FREQ as a starting point to help me get familiar with my data – give me a sense as to how many observations has ‘0’ or ‘1’ for each treatment group for the CHECK variable and a similar view for the SCORE variable.

Binary Outcome Variable – CHECK = 0 or 1

I then ran the analysis for my CHECK variable:

Proc glimmix data=orplay;
    class trmt;
    model check = trmt / dist=binary link = logit oddsratio(diff=all) solution;
    title “Results for Check – in relation to the value of ‘0’ in Check”;
    contrast “Treatment A vs Treatment B” trmt -1 1 0 0 ;
    contrast “Treatment A vs Treatment C” trmt -1 0 1 0 ;
    contrast “Treatment A vs Treatment D” trmt -1 0 0 1 ;
    contrast “Treatment B vs Treatment C” trmt 0 -1 1 0 ;
    contrast “Treatment C vs Treatment D” trmt 0 -1 0 1 ;
    contrast “Treatment C vs Treatment D” trmt 0 0 -1 1 ;
Run;

The first time I ran this code – I noticed that it is creating the results in relation to the value of ‘0’ for my CHECK variable.  The output states: “The GLIMMIX procedure is modeling the probability that CHECK = ‘0’ ”  This is ok!  But, if you are studying the response to your treatments and the response you are interested in is the ‘1’ – then let’s add a bit to the SAS coding to obtain the results in relation to CHECK = ‘1’.  This change will depend on what you are studying – when we start talking about Odds Ratios – we will be saying that the Odds of CHECK = 1 are ….  or the Odds or CHECK=0 are ….

So my new coding will be:

Proc glimmix data=orplay;
    class trmt; 
    model check (event=”1″) = trmt / dist=binary link = logit oddsratio(diff=all) solution;
    title “Results for Check – in relation to the value of ‘1’ in Check”;
    contrast “Treatment A vs Treatment B” trmt -1 1 0 0 ;
    contrast “Treatment A vs Treatment C” trmt -1 0 1 0 ;
    contrast “Treatment A vs Treatment D” trmt -1 0 0 1 ;
    contrast “Treatment B vs Treatment C” trmt 0 -1 1 0 ;
    contrast “Treatment C vs Treatment D” trmt 0 -1 0 1 ;
    contrast “Treatment C vs Treatment D” trmt 0 0 -1 1 ;
Run;

Take note of some of the coding options I’ve used.  At the end of the MODEL statement I’ve asked for the odds ratios and the differences between all of them, as well as the solutions to the effects of each treatment level.  Also note that I have also requested the CONTRASTS between each treatment effect.  All of these pieces of information will help you to tell the story about your CHECK variable – but remember we chose to talk about CHECK=1.

The output can be viewed at this link – output_20190625– be sure to scroll to the appropriate section – entitled “Results for Check – in relation to the value of ‘1’ ”

The Parameter Estimates table provides the individual estimates of each treatment.  Note that the last treatment has been set to 0 – which allows us to view how each treatment compares to the last.  Also note the t Value and associated p-value.  This will help you decide whether the estimate differs from 0 or not.  As an example – Trmt A has an estimate of 2.7726 and is different from 0.  Leading us to suggest that the effect of Trmt A is 2.77 times greater than that of Trmt D.  Trmt B on the other hand does not differ from 0 and therefore provides similar results as Trmt D.

The next table our Type III fixed effects – suggests that there may be a treatment effect – although the p-value = 0.0598 – so I will leave that up to the individual reader to interpret this value.  Personally, I will not ignore these results based solely on a p-value > than the “magical” 0.05.

Moving onto the next table – Odds Ratio Estimates.  The FUN one!!!  So – the first thing to keep in mind – please look at the 95% Confidence Limits first!  IF the value of ‘1’ is included in the range – this means that the odds are equal for a CHECK =1 for the 2 treatment groups listed.  So… let’s try it.

From the table we see:

Trmt A vs Trmt B  Odds ratio estimate = 0.250 95% CI ranges from 0.033 – 1.917

The odds of having a Check = 1 are the same for observations taken from Trmt A or Trmt B.  This is due to the fact that the CI range includes 1 – equal odds.

Trmt A vs Trmt D Odds ratio estimate = 0.063 95% CI ranges from 0.005-0.839

The odds of having a Check = 1 are 0.063 times less for observations on Trmt A than Trmt D.

The trick to reading these or best practices:

  1. Check the CI first – if ‘1’ is included – then there are no differences and you have equal odds or equal chances of the event happening – or in this case of having CHECK=1 in either treatment.
  2. If ‘1’ is not included in the CI – then we have to interpret the Odds Ratio estimate.
  3. Always read from Left to Right for the treatments – so the Treatment on the left has a BLANK odd over the Treatment on the right.
  4. Now the value of the odds ratio estimate tells you whether it is greater or less than.  If the value of the estimate is < 1 then we say the odds of Check = 1 is less for the Treatment group on the left than the Treatment group on the right.
  5. If the value of the estimate is > 1 then we say the odds of Check = 1 is greater for the Treatment group on the left than the Treatment group on the right.
  6. ALWAYS start with the odds of X happening – so in this case that Check =1.

Let’s go back and look at the results for CHECK = 0.  If you go back to the Results PDF file and scroll up to the section titled:  “Results for Check – in relation to the value of ‘0’”.

From the Odds Ratio Estimates table we see:

Trmt A vs Trmt B  Odds ratio estimate = 4.000 95% CI ranges from 0.522 – 30.688

The odds of having a Check = 0 are the same for observations taken from Trmt A or Trmt B.  This is due to the fact that the CI range includes 1.

Trmt A vs Trmt D Odds ratio estimate = 16.000 95% CI ranges from 1.192 – 214.687

The odds of having a Check = 0 are 16 times greater for observations on Trmt A than Trmt D.

I hope you can see how the statements are saying the same thing – but we just have a different perspective.  These can get tricky – but just keep in mind – what the outcome is – CHECK = 1 or CHECK = 0 – start by saying this first and then add the less or greater chance part after.

Multinomial Ordinal Outcome Variable

Most often we work with data that has several levels, such as Body Condition Score (BCS) in the animal world, or Disease severity Scores in the plant world.  Any measure that is categorical in nature and has an order to is – should be analyzed as a multinomial ordinal variable.

Guess what?  When you work with this type of data – you are back to working with Odds Ratios but this time you have several levels and not the basic Y/N or 0/1.  So how do we work with this?  How do we interpret these results?

In the Excel spreadsheet I provided above there was a second outcome measure called SCORE – this is a score or ordinal outcome variable with levels of 1 through to 5.  The SAS code I used to analyze this variable is as follows:
Proc glimmix data=orplay;
    class trmt; 
    model score = trmt / dist=multi link=cumlogit oddsratio(diff=all) solution;
    title “Results for Score – a multinomial outcome measure”; 
    estimate “score 1: Treatment A” intercept 1 0 0 0 trmt 1 0 0 0 /ilink;
    estimate “score 1,2: Treatment A” intercept 0 1 0 0 trmt 1 0 0 0 /ilink;
    estimate “score 1,2,3: Treatment A” intercept 0 0 1 0 trmt 1 0 0 0 /ilink;
    estimate “score 1,2,3,4: Treatment A” intercept 0 0 0 1 trmt 1 0 0 0 /ilink;
    estimate “score 1: Treatment B” intercept 1 0 0 0 trmt 0 1 0 0 /ilink;
    estimate “score 1,2: Treatment B” intercept 0 1 0 0 trmt 0 1 0 0 /ilink;
    estimate “score 1,2,3: Treatment B” intercept 0 0 1 0 trmt 0 1 0 0 /ilink;
    estimate “score 1,2,3,4: Treatment B” intercept 0 0 0 1 trmt 0 1 0 0 /ilink;
    estimate “score 1: Treatment C” intercept 1 0 0 0 trmt 0 0 1 0 /ilink;
    estimate “score 1,2: Treatment C” intercept 0 1 0 0 trmt 0 0 1 0 /ilink;
    estimate “score 1,2,3: Treatment C” intercept 0 0 1 0 trmt 0 0 1 0 /ilink;
    estimate “score 1,2,3,4: Treatment C” intercept 0 0 0 1 trmt 0 0 1 0 /ilink;
    estimate “score 1: Treatment D” intercept 1 0 0 0 trmt 0 0 0 1 /ilink;
    estimate “score 1,2: Treatment D” intercept 0 1 0 0 trmt 0 0 0 1 /ilink;
    estimate “score 1,2,3: Treatment D” intercept 0 0 1 0 trmt 0 0 0 1 /ilink;
    estimate “score 1,2,3,4: Treatment D” intercept 0 0 0 1 trmt 0 0 0 1 /ilink;
Run;

Notice the changes in the MODEL statement from the example listed above?  We have a distribution listed as multi(nomial) and we are using the cumlogit link.  I have also included the oddsratio(diff=all) and solution options – just as we did above.  I’ll talk about all those estimate statements after we review how to read the odds ratios.

If you go back to review the PDF results file from above or here – please scroll down to the last analysis titled ” Results for Score – a multinomial ordinal measure”.

First thing to note is the information listed on the Response Profile Table:

Response Profile Table

The note at the bottom of this table is the KEY to reading and interpreting the Odds Ratio.  We are modelling the probabilities of have a lower score!  That’s what this means!  So when we are talking about the OR – we are always talking about the odds of having a lower SCORE.

So let’s jump down a bit in the output file.  The Type III Fixed Effects table is telling us that there are some differences present.

Now let’s look at the Odds Ratio Estimates table – using the same best practices as listed above – let’s try the reading the same 2 comparisons we did above:

From the Odds Ratio Estimates table we see:

Trmt A vs Trmt B  Odds ratio estimate = 0.578 95% CI ranges from 0.090 – 3.708

The odds of having a lower SCORE are the same for observations taken from Trmt A or Trmt B.  This is due to the fact that the CI range includes 1.

Trmt A vs Trmt D  Odds ratio estimate = 54.544 95% CI ranges from 5.280 – 563.489

The odds of having a lower SCORE are 54.54 times greater with Treatment A than with Treatment D.

Seems pretty easy right?  If you keep these guides in your mind – it will be easy to read the results.  The tricky part is what are those scores?  Is a lower score or a higher score better?  Trust me – you can get pretty twisted up when you are looking for a higher score, but the results are referring to a lower score – oh my!!

Ways to work with this – you can change the order of your data – sorry there is no SAS coding as in the 0/1 data.

Alright – let’s keep working through the output.  I added quite a few ESTIMATE statements.  These provide us with the cumulative probabilities of obtaining a particular Score in a particular treatment.  Hmmm…  this might be the answer to interpreting the odds Ratios???  Remember – it all comes back to your Research Question!!

Estimated Probabilities for each Score level

Let’s take a look at the Estimates table – you should see a list that matches all the ESTIMATE statements I listed in the SAS code.  Each statement is calculating the estimated probabilities for a given Treatment and Score levels.  For example:

estimate “score 1: Treatment A” intercept 1 0 0 0 trmt 1 0 0 0 /ilink;

Will provide us with the estimated probability that an observation in Treatment A will have a Score of 1.  In the Estimates table the column Mean provides us with that probability.  In this example, we have a value of 0.6383 – so with this dataset, there is a 63.83% probability that an observation on Treatment A will have a Score value of 1.

Remember these are cumulative probabilities – so to calculate the probability of have a Score of 2 in Treatment A – we take the value for the second Estimate statement which states:

estimate “score 1,2: Treatment A” intercept 0 1 0 0 trmt 1 0 0 0 /ilink;

This statement shows the probability of having a score of 1 and 2 for Treatment A which has a value of 0.8190.  Therefore, to obtain the estimated probability of having a Score of 2 in Treatment A we would need to subtract the probability of having a Score = 1 – which would be:  0.8190 – 0.6383 which equals 0.3968 or 39.68% chance of having a Score of 2 in Treatment A.

You would follow the same process to obtain the estimated probabilities for Score of 3 and 4.  Since we have 5 Scores – the last last would be calculated as 1 – cumulative probability for Scores 1, 2, 3, 4.  In this example – we would have 1 – 0.9941 = 0.0059 or 0.59% chance of having a Score of 5 with Treatment A.

If you were to calculate all the estimated probabilities for this example you would have a table similar to this:

Estimated Probabilities

Conclusion

Working with binary and multinomial ordinal data can be fun and challenging.  Just remember – if the Confidence Interval includes the number 1 – then the two treatments have equal odds of happening.

To read the Odds ratios – The odds of having a lower score OR having a Check =1 are X greater  (if the value is >1) or X less  (if the value is <1) for the treatment on the left compared to the treatment on the right.

I hope this helps!  I’ll keep working on better ways to explain this.

Name